The aim of this LED tutorial is to explain the light-emitting diode in a simple and understandable way.
In the following, the basics are explained as well as the advantages and disadvantages. In addition to the electrical properties, a brief insight into the field of optical parameters is also provided. We also recommend the knowledge article Units of light. There, the most important physical and optical units are explained and compared, and help is provided with the question: How do you compare light sources correctly?
The correct operation of an LED is also explained in this LED tutorial, as is the importance of thermal management.
LED explanation: What is a light-emitting diode?
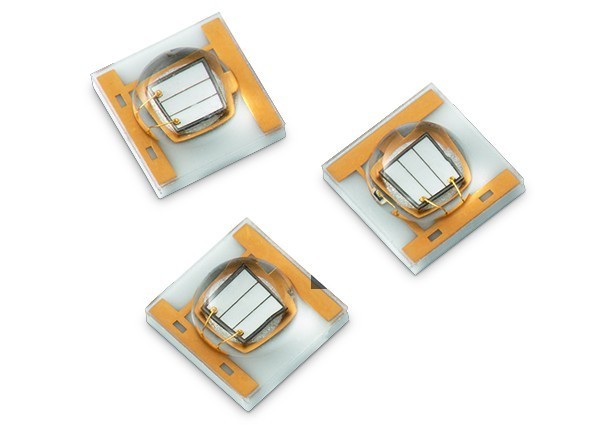
The lightemitting diode (LED) is an electronic component that emits light when current flows through it.
This semiconductor component has the same electrical properties as a diode. For this reason, they can be seen as a one-way street. They only allow current to pass in one direction (flow direction). In contrast, no current can flow through the diode in the other direction (reverse direction).
The LED behaves in exactly the same way as the diode. The only difference is that light is emitted (given off) when it is operated in the direction of flow.
This light does not even have to be in the visible range. There are both infrared and UV LEDs, which brings us to the next point.
Light color, light spectrum and wavelength
This part of the LED tutorial is about the light color and wavelength of LEDs.
The human eye only sees the wavelength between approx. 380 and 780 nm (nanometers) of the entire light spectrum. The two neighboring ranges are ultraviolet and infrared and the human eye – unlike some animals – is not sensitive here and therefore cannot see it.
An LED always produces monochromatic light(with the exception of white LEDs). In other words, a light with only one specific wavelength and therefore only one color. This wavelength cannot be influenced and can be regarded as constant. The wavelength of the RGB LED cannot be changed either. Almost the entire color palette is created here by mixing the individual primary colors (red, green, blue), but more on this later in this LED tutorial.
Light spectrum and wavelength of white light
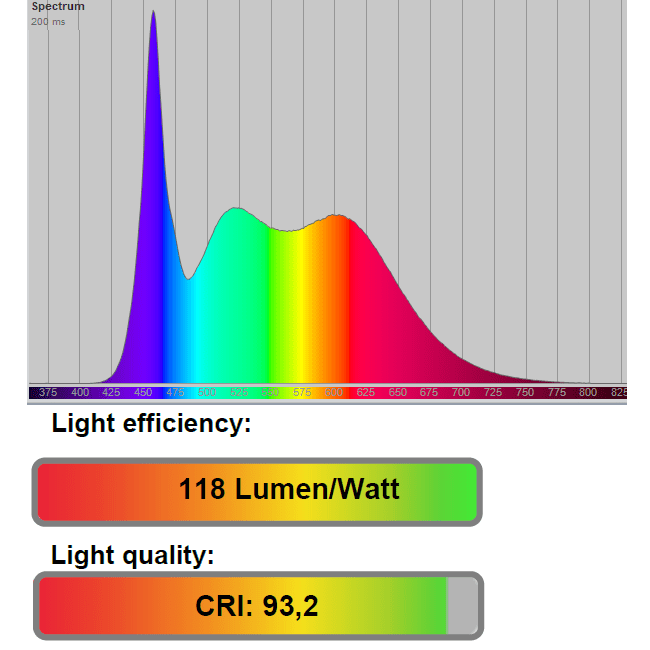
The white LED is an exception: white light does not consist of just a single wavelength – but of the sum of several – ideally of all wavelengths in the visible range of the spectrum. This can be seen very clearly when the spectral colors are broken down into the respective individual colors. Examples of spectral color decomposition are the rainbow or the reflections of a CD.
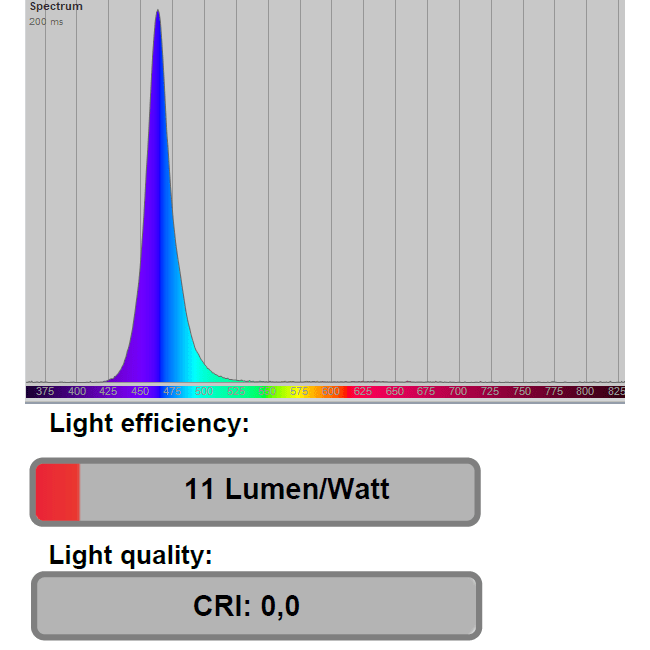
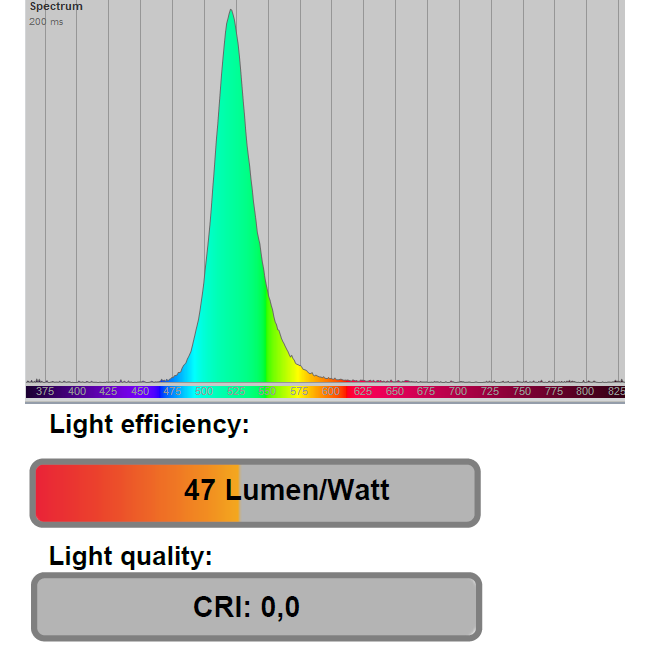
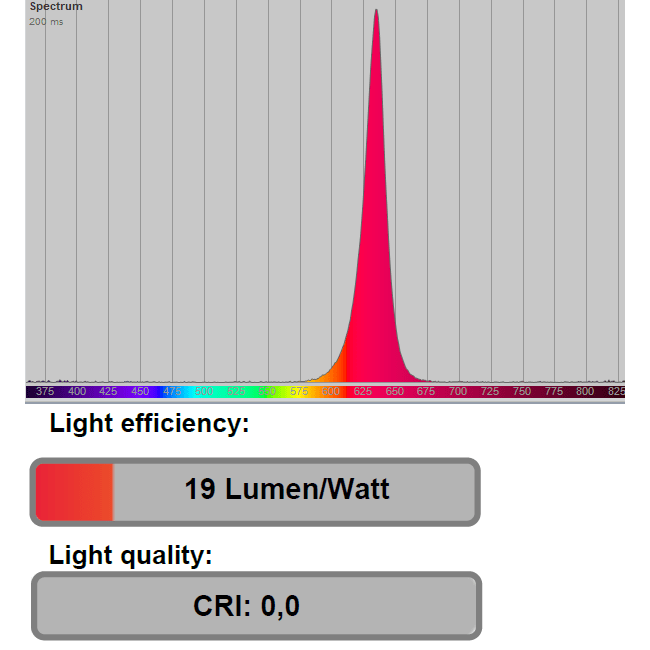
A blue or ultraviolet LED is usually used as the basis for a white LED, which is additionally coated with a “filter” (e.g. phosphor). This filter layer shifts the primary wavelength and fans it out into different wavelengths. For a better understanding, we measured some LEDs with our in-house goniophotometer in Emilum ‘s light laboratory:
LED tutorial: RGB color light and the problem with the light spectrum
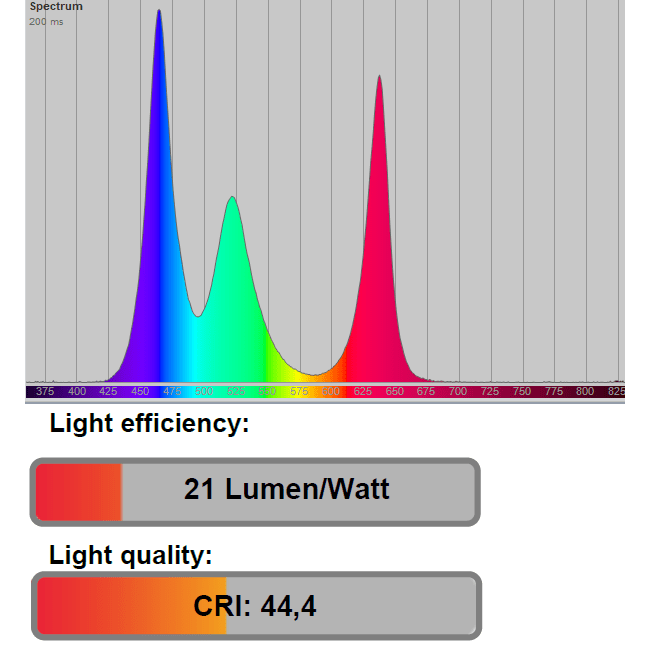
As the measurements from the light laboratory illustrate, the individual colors always have a very narrow-band light spectrum and a dominant wavelength, with all the advantages and disadvantages: Additive color mixing makes it easy to create mixed colors. For example, a red + green LED can be used to create different shades of orange and yellow. If you also add a blue LED, you can create almost “all” colors. Incidentally, this is the classic variant for generating the enormous variety of 16.7 million colors in LED strips and LED spots.
Even the most diverse shades of white can be generated. However, if we recall the light spectrum, we immediately see that some wavelengths are completely missing. This results in an extremely poor color rendering index, as only a fraction of the wavelengths of white light occur. In other words, white light generated from RGB is very, very artificial and far removed from the natural light spectrum of the sun…
It is therefore not a good idea to simply generate white light with RGB LEDs. For this reason, an additional white channel is added to the RGB in professional products (examples: RGBW spotlight, LED wall light). This not only has the advantage that the CRI (color rendering index) is greatly improved, the efficiency is also optimized by a considerable factor.
What about infrared and UV radiation with LEDs?
Compared to (halogen) light bulbs, LEDs are not heat emitters. Light bulbs convert electrical energy not only in the visible wavelength range, but also in neighboring spectral ranges (infrared, UV).
The infrared range can also be felt as heat radiation with these light sources (which means that fruit/vegetables, for example, have a shorter shelf life). In contrast, the UV component yellows various objects/items.
In any case, these areas simply do not occur with LEDs due to the monochromatic light. Therefore, not only are these disadvantages avoided here, but the luminous efficacy of the light source is also significantly improved!
Why is thermal design so important for LEDs?
As is usual in technology, there is no advantage without a disadvantage and this is what we will discuss in this part of the LED tutorial:
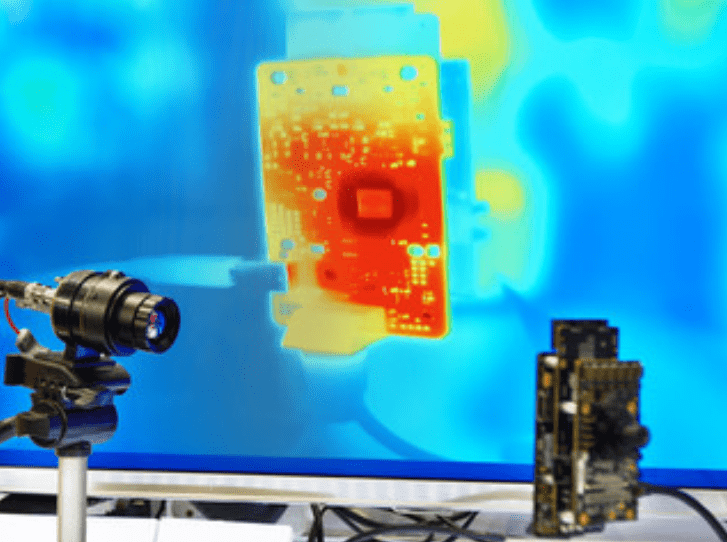
Light bulbs emit part of their power loss (infrared component) directly with the light beam. This protects them from being destroyed by heat. On the other hand, the monochromatic light of the LEDs means that the power loss remains directly with them. As a result, the heat generated must be dissipated separately from the LED. Otherwise, the service life of the LED suffers considerably and premature destruction occurs!
In addition, the efficiency of the LED deteriorates as it heats up. More energy must therefore be fed into the light source in order to generate the same luminous flux (unit lumen).
The thermal design of an LED must therefore be given just as much attention in a professional product as the electrical design. A service life of over 50,000 hours for the LEDs is an absolutely realistic value with good thermal design, but less than 1,000 is also realistic with poor design.
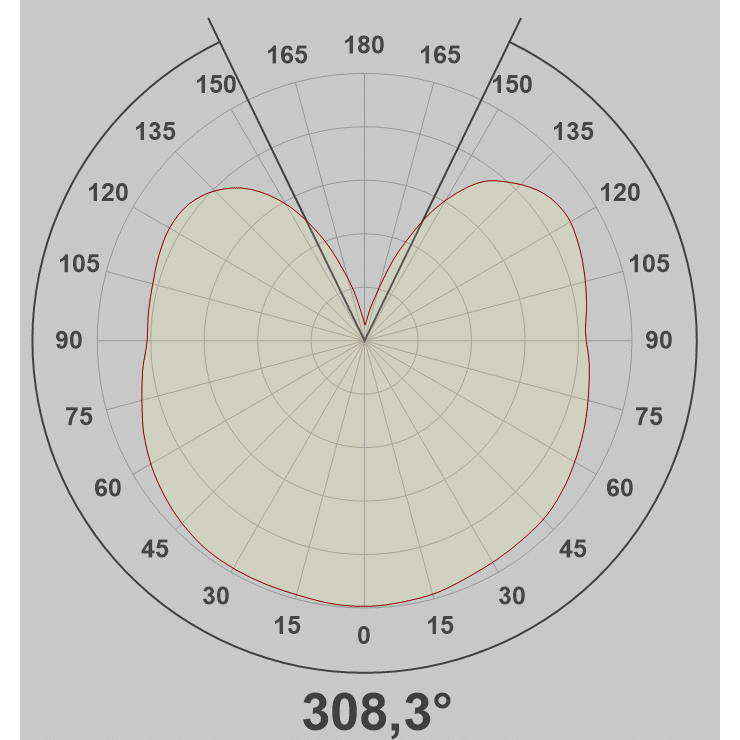
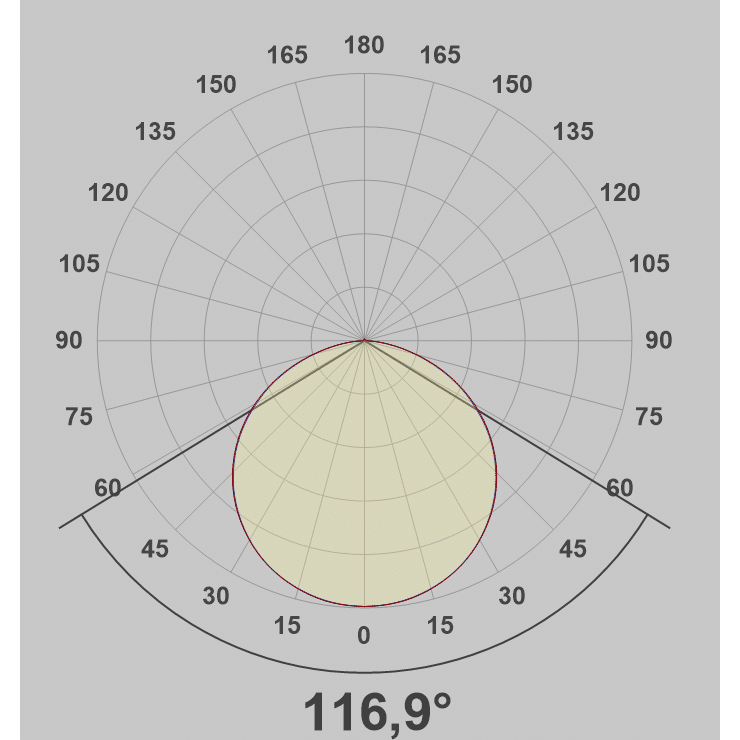
Beam angle of LEDs:
Compared to the light bulb, there is another optical parameter to consider and this is what this part of the LED tutorial is about:
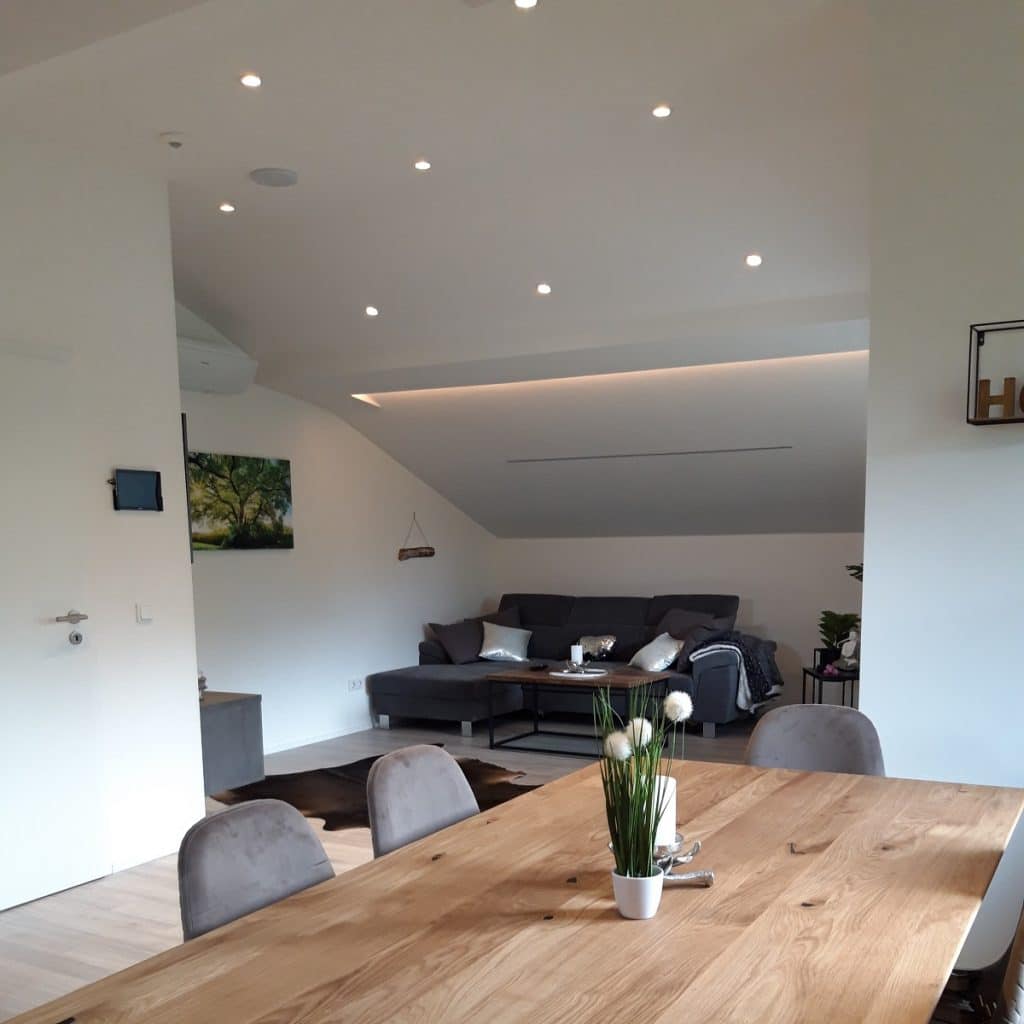
The light bulb shines in almost all directions and with the same light intensity. Although this sounds tempting at first, it is usually counterproductive! This is because such light distribution is rarely needed and simply wastes light, energy and money.
Under-cabinet lighting in the kitchen, for example, should only illuminate the work surface and downlights, by definition, only emit their light downwards. LEDs are the ideal light source here, as they
a) already have a predefined beam characteristic (with part of the room angle), for example 120°
b) are easy to direct using secondary optics/reflectors
c) are small and easy to position at suitable points in the luminaire
Beam angle of typical LED products:
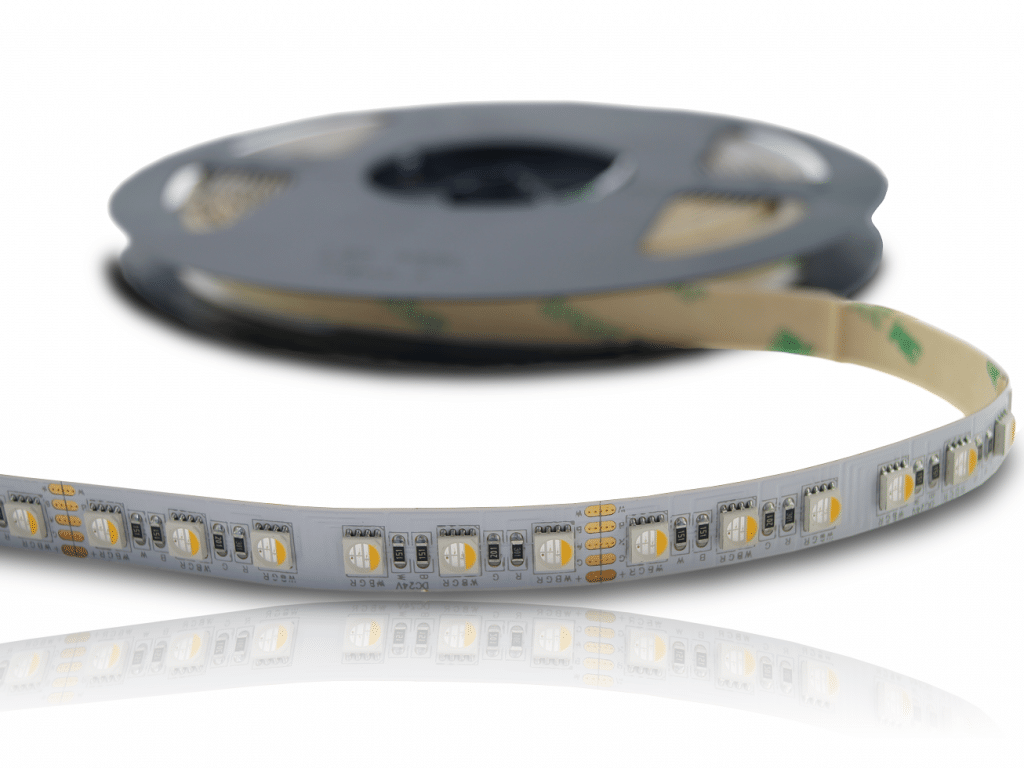
The typical beam angles for LED luminaires range from 60° (the usual angle for LED ceiling spotlights) to 120° (the most commonly used angle of the LED itself, therefore common for LED strips or a ceiling light) to 180° (COB technology, as with our LED strips without dots)
For professional products, a comprehensive light calculation is therefore carried out before product development, the result is measured during the pilot series and the exact data is made available to the customer.
The electrical properties of an LED and the UI characteristic of a light-emitting diode
Before we explain the UI characteristic curve of the LED, there is a brief note on the relationship between the brightness and current of the LED. The brightness of the LEDs – i.e. the total luminous flux emitted – is almost directly proportional to the electric current flowing through the light-emitting diode.
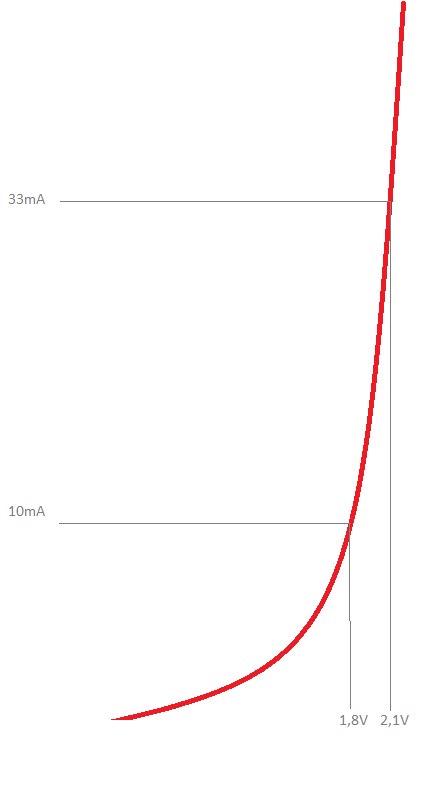
The U/I characteristic of the LED is similar to the characteristic of a diode. Small changes in voltage therefore already cause very high changes in current and therefore brightness. We have therefore included the typical U/I characteristic of an LED to illustrate this phenomenon.
The forward voltage (the voltage across an LED) is in turn strongly influenced by the temperature. This clearly shows that constant voltage control appears to be completely unsuitable for a number of reasons.
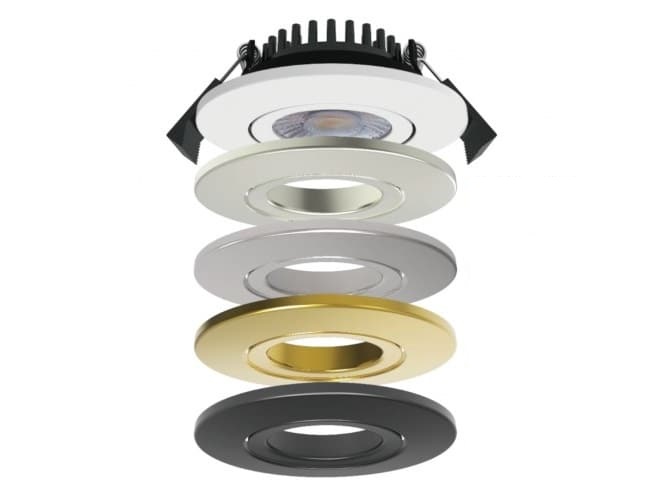
If you look at the UI characteristic of the LED, the best solution is therefore to operate the LEDs at a constant current. For example, simpler LED strings can be supplied with constant-current power supply units. High-quality products such as recessed LED spotlights have a corresponding electronic circuit included to ensure proper, long-lasting operation of the LEDs. This means that these products can not only be operated with a familiar constant-voltage power supply unit, but their brightness can also be fully adjusted with PWM dimmers.
The matching products for this theme area in our online store